Thursday, December 30, 2010

Shadow Box Bank

My leg is feeling better, so I was able to get a little bit of crafting done this evening.  I made this shadow box bank to go with Kaylee's birthday present.  Her birthday is not until Feb., but she is having a bowling party and I wanted to go ahead and do this.

I started out with a 5x7 shadow box. 
I then used the picture inside the frame to cut a white base and used the Nifty Fifties cartridge to cut the bowling pin and ball and the title.  I cut the Spare Change part out with vinyl.

Next, I cut a rectangle in the side of the paper and then laid it over the back of the shadow box and traced the inside of the rectangle.  I then used an exacto knife to cut the piece out.


Once my rectangle was cut, I used my tape runner to attach the paper directly to the back.  This way, it won't move when you add the change in it.

Now, I put it back into the shadow box to finish the bank.  The coins can fit right into the slot.


I am linking this up here:

Party Button


mmm button

Tuesday, December 28, 2010

Hope everybody is having a good week.  I may not have any posts for the next few days, because I slipped on some ice and hit my knee that I had surgery on.  It is pretty swelled up and banged up.  I am having to ice it and stay off of it for a day or so and on pain meds for it, so I may not have any new stuff for the next few days.  Just wanted to let everybody know.  I should be back with some projects closer to the end of the week.

Saturday, December 25, 2010

A White Christmas!!

For the first time in my life, we had a white Christmas in Alabama!!!  We were so excited this morning when we woke up to it snowing.   Of course, we all had to play in the snow, since this is very rare for us.  Here are the snowmen that we made.

In this picture is:  Kaylee in front holding her tiny snowbaby, then my sister Whitney, me in the Green hat, then my sister Britney, my husband George and my other sister Melissa.  My mom said she is going to use this as her Christmas card picture next year, lol!
And here are our snowmen by theirselves.  Don't you love their tutu's!  And of course we had a witch hat and a pirate hat for them as well, lol.
Hope you all have had and continue to have a Merry Christmas!!

Friday, December 24, 2010

Merry Christmas!!

Hope everyone has a very Merry Christmas!!  I will be back with more projects next week after the holiday!  Until then, hope everybody has a wonderful time with family and friends and I hope that you all get everything you want from Santa!

Thursday, December 23, 2010

Santa's Workshop Layout

Here is a layout that I made for Christmas.  I used the Winter Frolic Cartridge for the title, Jolly Holidays for the Elves, B is for Boy for the Jack in the Box and Storybook for the photo spots.
For details, I added puffy paint to the hats, pom poms to the shoes, little buttons on the outfits, stickles and buttons on the wagon, and added some glitter presents.  I used a white opaque pen to add some faux stitching lines as well.

Wednesday, December 22, 2010

Justin Bieber Fever

Kaylee got an early Christmas present of Justin Bieber VIP tickets from her mom and the concert was last night. She made a sign to take with her and was so excited. Thought I would share a few pictures with you guys.

This is one our friend's daughter, Melissa (Kaylee's Mom) and Kaylee.
 She bought a book with pictures of Justin Bieber at the concer.
And here are a few pics of Justin Bieber.

A Glass Block for me

I have been making glass blocks for other people, so I thought I would make one for myself.

I started by using the string pearls from the Christmas area to fill a rectangular glass block.  I then used some shimmer ribbon to tie a bow around the block. I got all of these materials at Hobby Lobby and they were all 50% off.


I then used the Jasmine Cricut Cartridge to cut my name out of black vinyl to put on the front.  I think it turned out really pretty.

Tuesday, December 21, 2010

Strength Picture Frame

My sister, Whitney, asked me to make her a sign saying Strength to hang in her bedroom.  I bought this frame at Walmart for $3, cut a strip of beige paper to fit inside and then used brown cardstock and the Jasmine cartridge to cut the letters.  I then used the Tie the Knot cartridge to cut the swirl under the word.

Thank You!!

I received another Stylish Blogger Award from http://mommakcrafts.blogspot.com/.  I wanted to take a minute to thank her for passing this along to me.  Thanks so much!!!   If you haven't seen her blog before, be sure to check it out.
To see who I passed this award on to when I first received it, you can look here: http://jeanscraftycorner.blogspot.com/2010/11/blog-award_20.html

Candy Cane Mice

My mom used to make these little mice out of felt for candy canes when I was in school and I saw some that were made on this blog last year http://crazy4crafting.blogspot.com/, so I figured I would try and make some.  My mom did them out of green and red felt, but I decided to make mine in the colors of actual mice. 
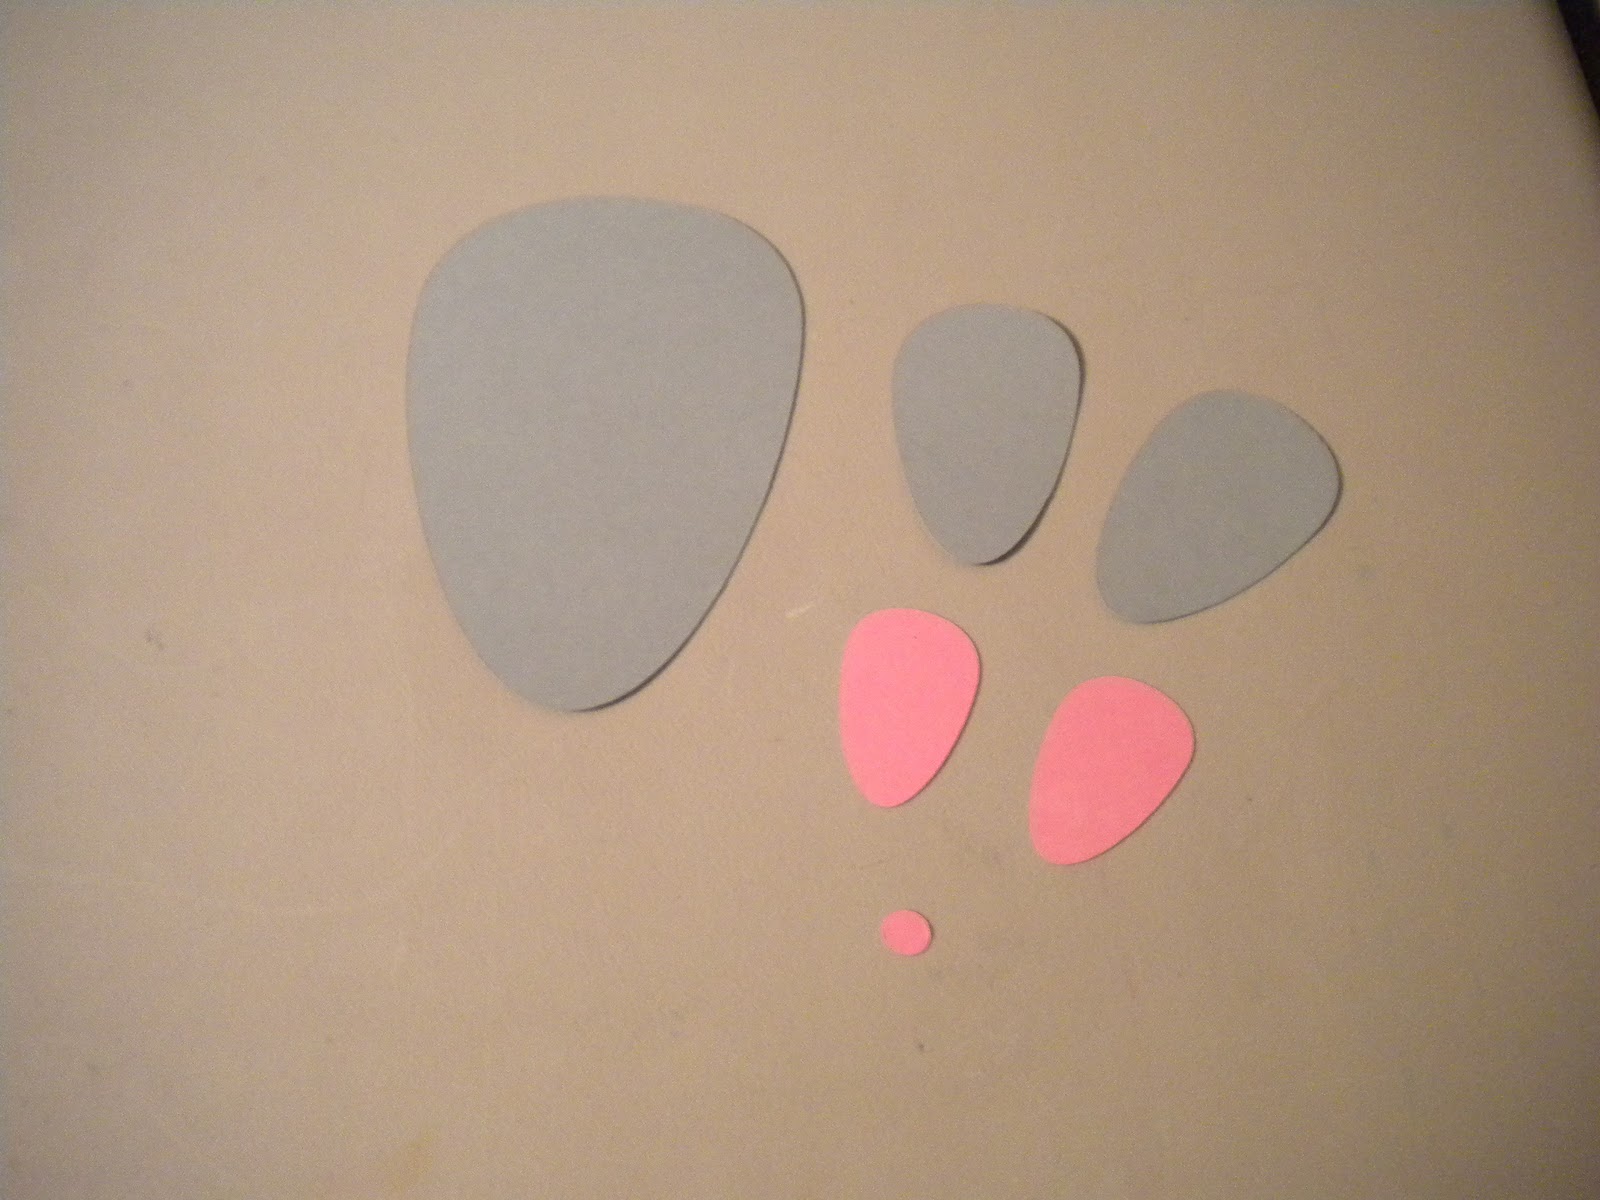
I used the Tags, Bags, Boxes and More cartridge for the tear drop shapes and the George and Basic Shapes cartridge for the circle for the nose.

Next, I marked where I wanted the slits for my candy canes with a pencil and then used an exacto knife to cut them.

Once the slits were cut, I put my mouse together. I layed the ears down on top of the body and traced them with a pencil exactly where I wanted them to be.  This way, I would know where to put the adhesive.
Once the mouse was assembled, I used a white pen to add faux stich lines around the ears, whiskars by the nose and eyelashes.  The eyes are black, flat backed pearls.  I thought they really looked like the little beady eyes that mice have.

I then put the candy cane through the slits in the mouse. You can position the mouse so the swirl part of the cane will look like his tail.


Monday, December 20, 2010

Winner for my giveaway for the Fantabulous Cricut Crawl

I used random.org to select a winner out of all of the comments left on my Fantabulous Cricut Crawl Post.  The winner is comment #31, which belongs to:

Mad Crafter said...

So, so, clever as usual:) Love this idea. This would make a nice gift too:) Yours came out so cute:) TFS and happy holidays:)
~Madison http://www.funkycards.blogspot.com/

Madison, I have sent you an email and will get the three stamps sets mailed out to you once I have your address.  Congratulations!!


Day 20 of 20 Days of Christmas: Sled Wall Hanging

For Day 20, I have a sled that I decorated to be a Christmas Wall Hanging. 

I found this sled at a thrift store and thought I could fix that up.  Here is how it looked to begin with.
First, I removed the tags and the yarn.  Then, I removed the wooden slats that were messed up and used a heat gun to fix them.

Next, I used acrylic paint to paint the top of the sled red.

Finally, I took two Christmas ornaments that I got Walmart for $1 each and hot glued them onto the sled.  I then added some red ribbon to hang it with.

Sunday, December 19, 2010

Day 19 of 20 Days of Christmas: Santa Suits

For Day 19, I made some Santa Suits to cover some boxes of candy that I had for stocking stuffers.
I started out with a box of whoppers and used white cardstock to make a pouch for the box of candy to fit into.

Now, I used the Cricut to make the cuts I would need for this project.  I used the Storybook Cart to cut the marquee cut twice in red and once in white, Wildcard to cut the buttons, George and Basic Shapes to cut a rectangle for the belt and Winter Frolic for the buckle.

I took the white marquee cut and cut the center out to fit it onto the red marquee for the front of the suit.
I then glued all of the details onto one of the red marquees for the front of the suit and two a second red marquee for the back of the suit.
I then used hot glue to attach these cuts to the front and back of the white cardstock pouch.

You can easily slide the box of candy out of these and still have the little santa suit pouch.

Saturday, December 18, 2010

Day 18 of 20 Days of Christmas: Reindeer Picture Frame

For Day 18, I have a reindeer picture frame to share with you.

I started out with a wooden picture frame from Michaels and used Krylon brown spray paint to cover the frame.

Next, I used the Paper Dolls Dress Up cartridge to cut the riedeer.  I stretched the reindeer in the gypsy to get the antlers as large as I needed them.

Then, I took the antlers and laid them on the back of my frame to determine where they needed to be glued.  I used a pencil to trace them and then put the hot glue directly onto the frame before attaching the antlers.

I then used hot glue to attach two google eyes and a red pom pom for the nose.

To finish the frame off, I added some a holly leaf and berries from the plastic plant piece that I had used on the snowman books.

Now, I put a piece of glitter cardstock in the frame and it is ready to add a Christmas picture to.

I am linking this up here: