Sunday, December 5, 2010

Day 5 of 20 Days of Christmas: Glass Blocks and Second Pick a Stocking Giveaway

For Day 5, I have two mini glass blocks to share with you.  (Also, be sure to read to the bottom of the post for the second pick a stocking giveaway information)


For the first block, I filled the mini glass block with 20mm sized silver bells.  These come in a pack of 75 in the Christmas area of Hobby Lobby and it took 2 tubes of bells to fill the block.

I then took ribbon and tied it around the block and made a bow.  I used some red and silver ribbon that I found in the Christmas area at Walmart.

Now, I cut the red vinyl for the front of my block.  I used the Winter Frolic cartridge to cut the Deck the Halls title.  I know I have mentioned this before, but for those that are new to my blog, a great tip for transfering the vinyl to your image is to use joint tape from the hardware department.  It is much cheaper than transfer tape and works great.


For the second block, I purchased some mini glitter ornaments from Hobby Lobby and filled the block with them.  It took about 14 ornaments to fill it.

I then used some green ribbon to tie a bow around the block.

To finish it off, I used black vinyl to cut the Swirl Tree from the Christmas Solutions Cartridge.

Second Pick a Stocking Giveaway:  The 3rd stocking has been picked, but 1 and 2 are still up for grabs.  To enter for your chance to pick a stocking:
1) Become a Follower if you are not already
2) Leave a Comment on this post with a way to contact you (blog, email, etc)

All comments through Tuesday, December 7th will be entered in this contest and I will use random.org to select a winner.  Winner will be announced on Wednesday, December 8th and will be able to pick which of the remaining stockings they would like to receive.  Here is a picture of the stockings up for grabs.

Saturday, December 4, 2010

Day 4 of 20 Days of Christmas: Snowman Doughnuts

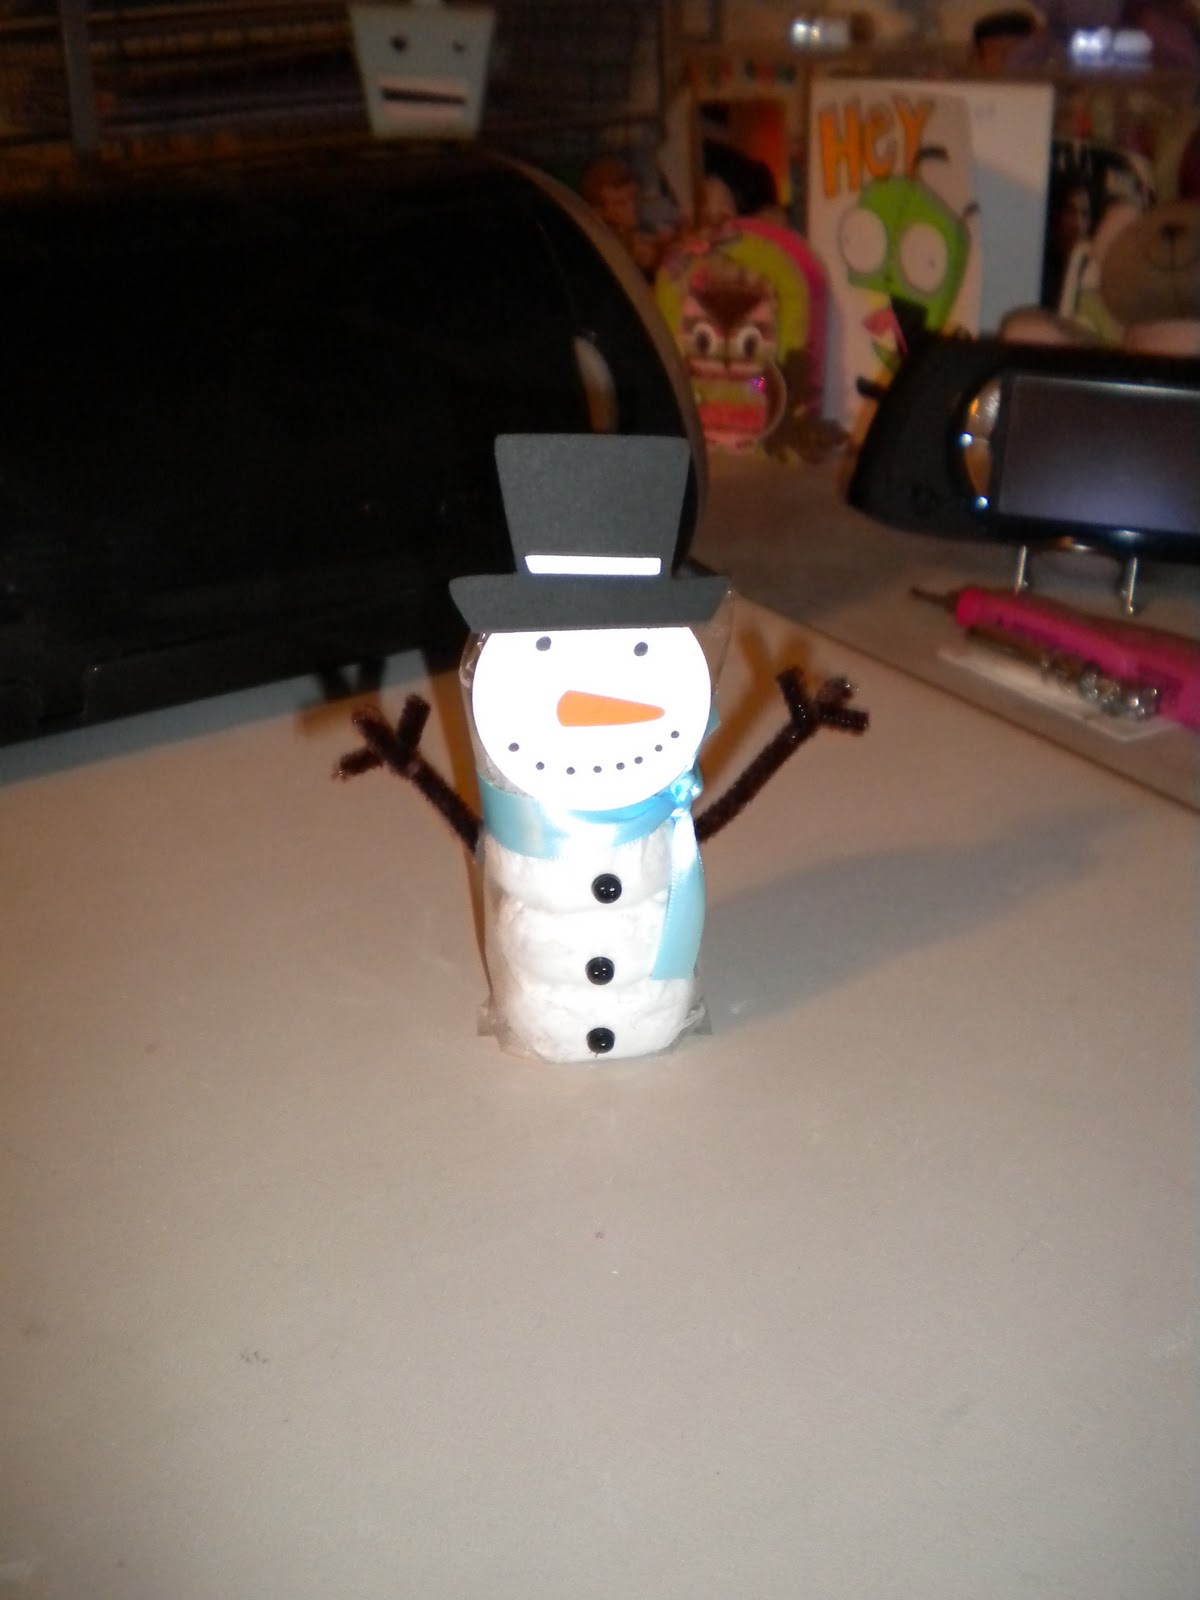
For Day 4, I have some Snowman Doughnuts to share with you.
These are made with the Little Debbie packs of 4 mini doughnuts.
Then, I used pipe cleaners to make the arms and hot glued them to the side. 
I then used the Cricut to cut a 2 inch circle with the George and Basic Shapes cartridge for the face.  The hat is from Gypsy Wanderings and the nose is from doodlecharms.  I hand drew the eyes and mouth on the face.
Finally, I hot glued a ribbon around the doughnuts to be a scarf and hot glued some buttons down the front.


I am linking this up here:
mmm button


Friday, December 3, 2010

Day 3 of the 20 Days of Christmas: Glitter Ornaments

For Day 3, I have made some of the popular glitter ornaments.  I have seen many of these made over the past couple of years, but these are the first ones that I made myself.  To make these, I used the Pledge floor wax with future shine (picture at bottom of post) and fine glitter (I used Martha Stewart and Stampendous brands) inside the glass ornaments.  You just swish around a little of the wax, empty it back out and then dump the glitter into your ornament and shake it up.  I used a paper towel to cover the top of the ornament while shaking the wax around and for the glitter as well.  Once they were coated with glitter, I used vinyl to decorate the outside and hot glued some bows to them to add a little decoration. 


The following carts were used:

M and K - Tie the Knot
Jean, Whit and Brit - Don Juan
Angel - Christmas Solutions
Joy - Winter Woodland
Snowflake - Designer's Calendar
Smiley Face - Graphically Speaking

This is the floor wax that I used to coat the inside of the ornament before applying the glitter.

I am linking this up here:
mmm button

First Pick a Stocking Winner

I used Random.org to pick a winner from all of the comments left on the day 1 post, and the first pick a stocking winner is:   Comment #11, which was from Saundra (Luv Scrapping Together).

Luv Scrapping Together said...

Great project, Jean! I would have never thought to use a pizza pan.
~Saundra

Congratulations Saundra!! I have sent you an email to get your address and to find out which stocking you would like to receive. 
 
Remember, the next pick a stocking giveaway will begin on December 5th!
UPDATE:  Saundra picked stocking # 3, so 1 and 2 are still up for grabs.

Thursday, December 2, 2010

My Owl Christmas Tags

I looked everywhere this year trying to decide on what wrapping paper to get, and then I found this cute owl paper at Target.  You know I love owls, so I had to have it.  I used the Create a Critter Cartridge to make some owl tags to go with my paper.  I thought the owls were so cute, that I really didn't want to give them up, but I guess I could make me some more, lol.  I used brown paper that had a white backing for the base so it would be easy to add the names to these.  The little snowflake in the owl's hand is a piece of snowflake confetti.  Once they were cut and assembled, I used my crop a dile to punch the holes and tied some pink ribbon to them.  I made 23 of these tags in all. 


I am entering this into this week's challenge at Cricut Cardz Challenge Blog.  The challenge is to make a set of Christmas Tags of Christmas Gift Cards.  You can find the blog here: http://cricutcardzchallenge.blogspot.com/

I am also linking this up here:
mmm button

Cute and Simple Candy Cane

I made this really cute candy cane ornament yesterday with my sister Whitney when she came over.  I made one for her to give to her boyfriend and one for my hubby.  I took two candy canes and glued them together to look like a heart.  I then used the Smiley Cards cart to cut the gingerbread man and then I hot glued it to the candy canes.  These are really simple, but they look so cute!!


I am going to enter these into the Cooking with the Cricut Challenge "It's beginning to look a lot like Christmas".  If you haven't been to the site before, check it out here: http://cookingwithcricut.blogspot.com/

Also, If you are looking for the Day 2 of the 20 Days of Christmas post, scroll down to the previous post.

Day 2 of 20 Days of Christmas: Snowman Fridge

Welcome to Day 2 of the 20 days of Christmas.  If you joined me for the Halloween event, you probably remember the ghost fridge.  Before there was ever a ghost fridge, last year, we came up with the Snowman Fridge. 

To make this snowman, I first got a top hat from Party City.  Then, using black foam, the pieces for the eyes, mouth and buttons were hand cut and I used self stick magnets to the back of the pieces.  A white paint pen was used to add the details to the eyes.  For the nose, this is a paper mache cone piece that was painted orange and a magnet was hot glued to the back.  I really love this guy and it definately puts a smile on your face everytime you need to get in the fridge.

I am linking this project up to:
Party Buttonmmm button


Fun Stuff Fridays

Wednesday, December 1, 2010

Fuzzy Sock Sundae

I am sure everybody has seen the sock cupcakes that have been all over the net.  I made some for gifts and everybody loved them, so I was going to make a few more, but I saw one that was made in a large sundae cup on the Craft O Maniac link party, so I thought I would do a variation of that.  I couldn't find any of the large sundae glasses, but I got this small one at Walmart.  The fuzzy socks came from Walmart.  I added a red pixie stick, two candy canes and a fake cherry to the top.  I think it turned out cute and will make a nice gift.
I am linking this up here:

Party Button

Day 1 of the 20 days of Christmas: Christmas Countdown and a giveaway

Welcome to the 20 days of Christmas.  Today, the first project I have to share with you is a Christmas Countdown.  (I will also be giving away the first stocking in the Pick a Stocking giveaways, so be sure to look for details at the bottom of this post.)

First, I began with a pizza pan (you can get one at the Dollar store) and Rustoleum sky blue spray paint.  I painted the pan with one coat and let it dry for a few hours.


Next, I used the Don Juan Cartridge to cut 25 snowflakes out of white glitter cardstock.  Once they were all cut, I used a black marker to number them and then hot glued magnets to the back of each snowflake.  This way, you can remove a snowflake each day as you count down to Christmas!
Next, using the Don Juan Cartridge again, I cut the title out of white vinyl and placed it onto the pan.
Finally, I used the Doodlecharms Cartridge to cut a snowman from glitter cardstock for the center and added google eyes and some small buttons to spruce him up. I attached him with hot glue.  Then, I hot glued a strip of ribbon to the back to be able to hang the countdown from.

Here are a few close up pictures.


Also, today is the first Pick a Stocking Giveaway! During the month, I will be giving away three stockings, each full of scrapbook/craft goodies.  The first winner will get to pick which of the three stockings they would like to receive, then the second winner will pick their stocking from the remaining two, and the third winner will receive the remaining stocking.  To enter the first stocking giveaway, you will need to:

1) Become a follower if you are not already one.
2) Leave a comment on this post.
3) Leave a way for me to contact you if you are the winner (blog, email, etc).

I will take all comments through tomorrow, Thursday, December 2nd at midnight and use random.org to select a winner.  I will announce the winner on Friday and then contact them to find out which stocking they would like.  Here is a picture of the 3 stockings that will be up for grabs this month.

Be sure to check back in each day through the 20th for lots of fun Christmas projects and the remaining stocking giveaways as well.

I am also linking this project up here:

Party Button