









Sunday, May 22, 2011
Jack the Dog
Kaylee had pointed it out to me around Easter that we didn't have a scrapbook page for my sister Britney's new dog, Jack. So we took a couple of pictures so he could get his own page. The background paper for this came from the DCWV Pets stack. I cut his name out in white cardstock using the Robotz Cartridge for the font and added some black spots with a sharpie to match the spots he has.


Saturday, May 21, 2011
CWC Cele"bear"ation Blog Hop and Giveaway
Welcome to Jean's Crafty Corner and Cooking With Cricut’s Cele”bear”ation Blog Hop! We’ve been partying all month long in honor of CWC’s first blog-aversary. If you arrived here from visiting Melin at Cooking with Cricut you’re in the right place! If you’re crashing the party in mid-hop, head on over to Cooking With Cricut — grab some punch and cake and start at the beginning.
Our theme for today’s party is bears and/or celebrations. For my project, I decided to make a fold out card. The bears were welded together on the Gypsy using the Create a Critter Cartridge. I then cut the banner using the Carousel Cricut Lite Cartridge. I folded these the way that I wanted my card to fold and also folded the banner to fit nicely in the bear's hands. I hand wrote the sentiment in multiple colors (Cele"bear"ation) on the banner and added some faux stitch lines around the banner as well. As a final touch to my bears, I added some party hat stickers and some google eyes.


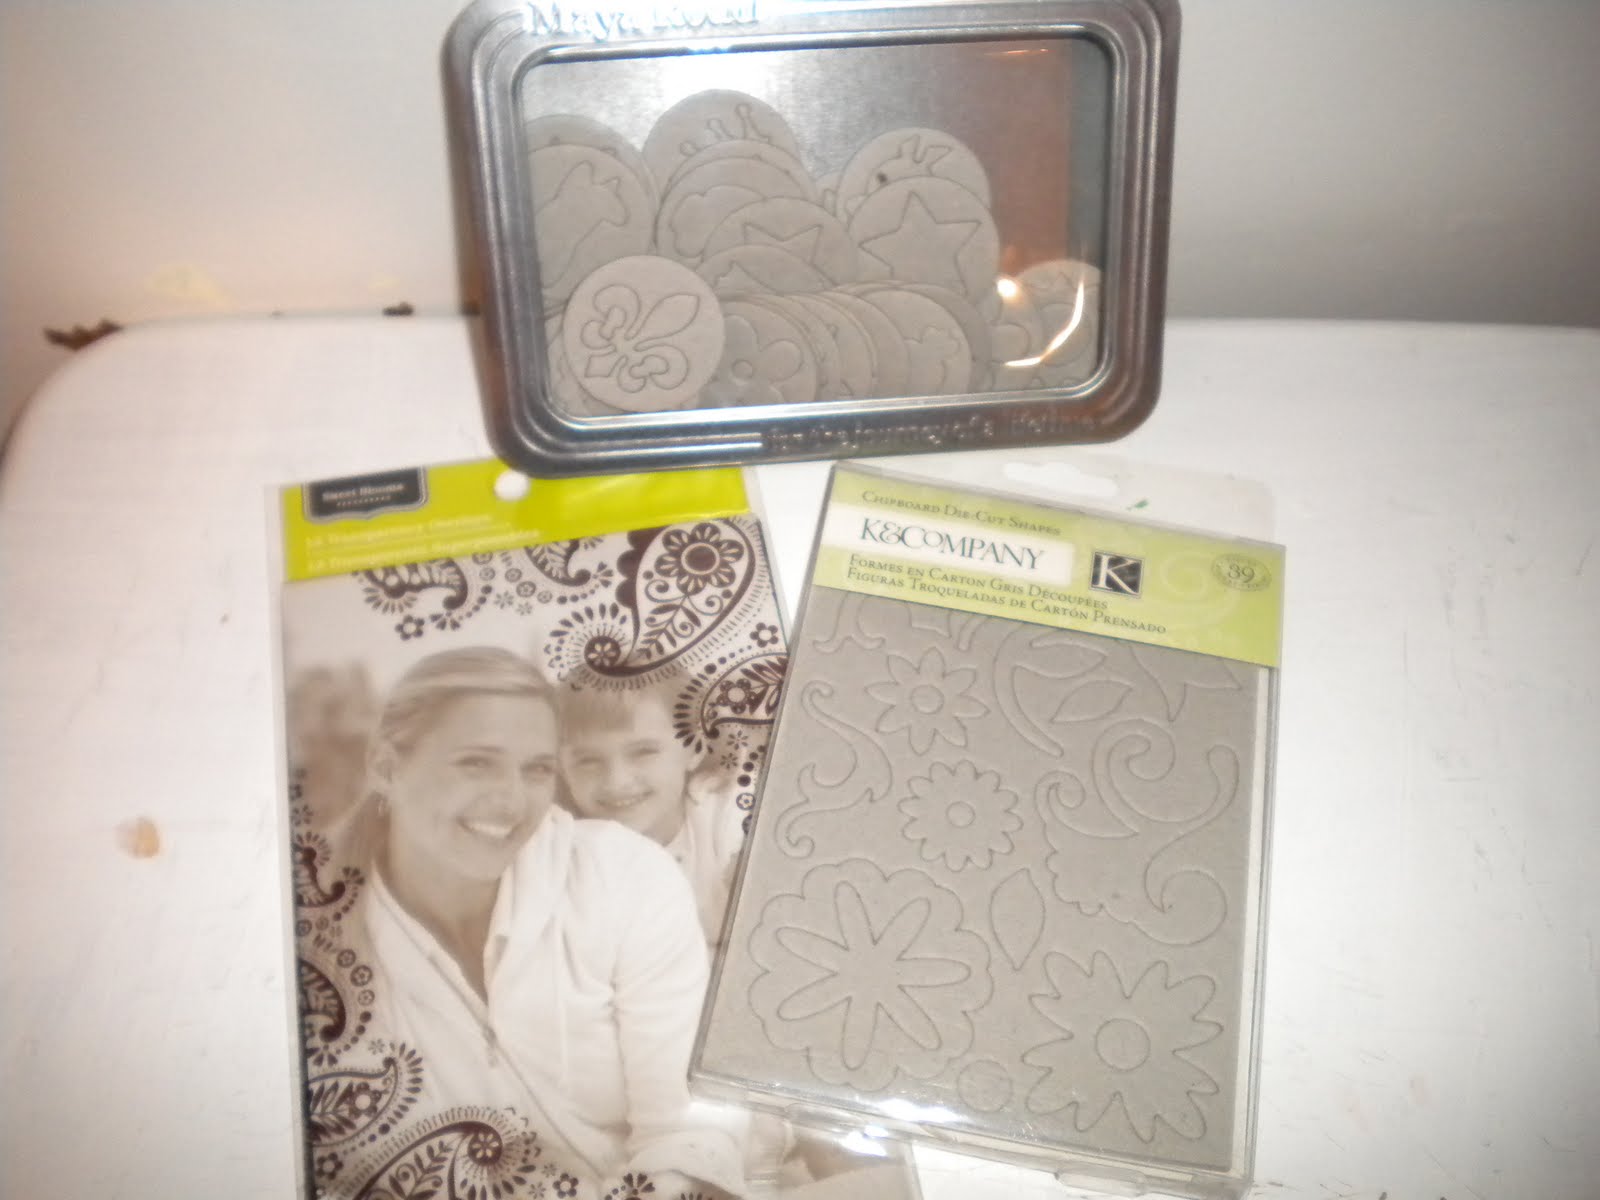
Now for the giveaway. I am offering a set of Maya Road Chipboard Pieces, K and Company Chipboard Shapes and a set of Photo Transparencies. To be elgible for this giveaway, you need to become a follower if you are not already and leave a comment on this post. All comments through Sunday, May 22nd will be entered and I will announce the winner chosen by random.org on Monday, May 23rd.
 Now it's your turn! Link up your cele”bear”ation-related project at http://www.cookingwithcricut.com/.
Here are the guidelines for the challenge:
- Project must include a Cricut cut.
- Project must include a Bear.
- Project must be new for this blog hop challenge.
- You must link to your post and not just your blog.
- Your post must include a link back to CWC.
You will have one week to complete your project. The Design Team will pick their three favorites and one lucky person will be chosen randomly to win one of the prize packages being offered over at Cooking with Cricut for this hop.
Thanks for joining our cele"bear"ation! Your next host in our party is Roberta at TX Scrapper Mom! Hop over and see what great inspiration she has for you today.
Our theme for today’s party is bears and/or celebrations. For my project, I decided to make a fold out card. The bears were welded together on the Gypsy using the Create a Critter Cartridge. I then cut the banner using the Carousel Cricut Lite Cartridge. I folded these the way that I wanted my card to fold and also folded the banner to fit nicely in the bear's hands. I hand wrote the sentiment in multiple colors (Cele"bear"ation) on the banner and added some faux stitch lines around the banner as well. As a final touch to my bears, I added some party hat stickers and some google eyes.

You can easily fold the bears up to fit in an envelope.

Here are the guidelines for the challenge:
- Project must include a Cricut cut.
- Project must include a Bear.
- Project must be new for this blog hop challenge.
- You must link to your post and not just your blog.
- Your post must include a link back to CWC.
You will have one week to complete your project. The Design Team will pick their three favorites and one lucky person will be chosen randomly to win one of the prize packages being offered over at Cooking with Cricut for this hop.
Thanks for joining our cele"bear"ation! Your next host in our party is Roberta at TX Scrapper Mom! Hop over and see what great inspiration she has for you today.
Thursday, May 19, 2011
Just Married Layout
Here is another wedding layout I worked on. I am slowly but surely getting the wedding album done. :) For the background paper, I started with a piece out of the SEI White Elegance stack. I then used the Gypsy to weld the title around a circle using the Don Juan and George and Basic Shapes Cartridge. I cut this out of silver shimmer paper. I then outlined it in black. I used the Sweethearts Cartridge to cut the car and I added some glitter buttons, a heart button and some faux stitching also. I finally added two heart shaped clips to the corners of the pictures.
 I am adding this layout to the following challenge:
My Sheri Crafts: Transportation Week: http://myshericrafts.blogspot.com/

My Sheri Crafts: Transportation Week: http://myshericrafts.blogspot.com/
Princesses on Ice Layout
I don't know why it has taken me so long to scrapbook this, but Kaylee went to see the Disney Princesses on Ice back in November and I finally got around to making a layout. She has been to a lot of the Disney on Ice Shows before, so I just wanted to do one page with these pictures since we have other layouts already.
I printed the title directly onto the page using the Elegance Font. I added two sparkly brads, one on each side of the title. Then, I used the Tinkerbell Cricut Cartridge to cut the wand out and covered it with silver stickles. I added a rhinestone flourish to look like it was coming from the wand and add more sparkle to the page. I cut my pictures into small squares to be able to fit more on the layout and matted them in white. Finally, I used a glitter gel pen to add some faux stitching around the photos to give it a little more sparkle.

I printed the title directly onto the page using the Elegance Font. I added two sparkly brads, one on each side of the title. Then, I used the Tinkerbell Cricut Cartridge to cut the wand out and covered it with silver stickles. I added a rhinestone flourish to look like it was coming from the wand and add more sparkle to the page. I cut my pictures into small squares to be able to fit more on the layout and matted them in white. Finally, I used a glitter gel pen to add some faux stitching around the photos to give it a little more sparkle.

I am entering this layout into the following challenge:
Alphabet Challenge Blog: B is for Brads and Bling: http://alphabetchallengeblog.blogspot.com/
Old School Wedding Layout - No Cricut
I made this layout to enter in the challenge over at Whimsical Wednesday this week. Their challenge is Back to Basics. You cannot use the Cricut on your project and you have to include an old school embellishment. You can find their blog here: http://whimsicalwednesdays.blogspot.com/.
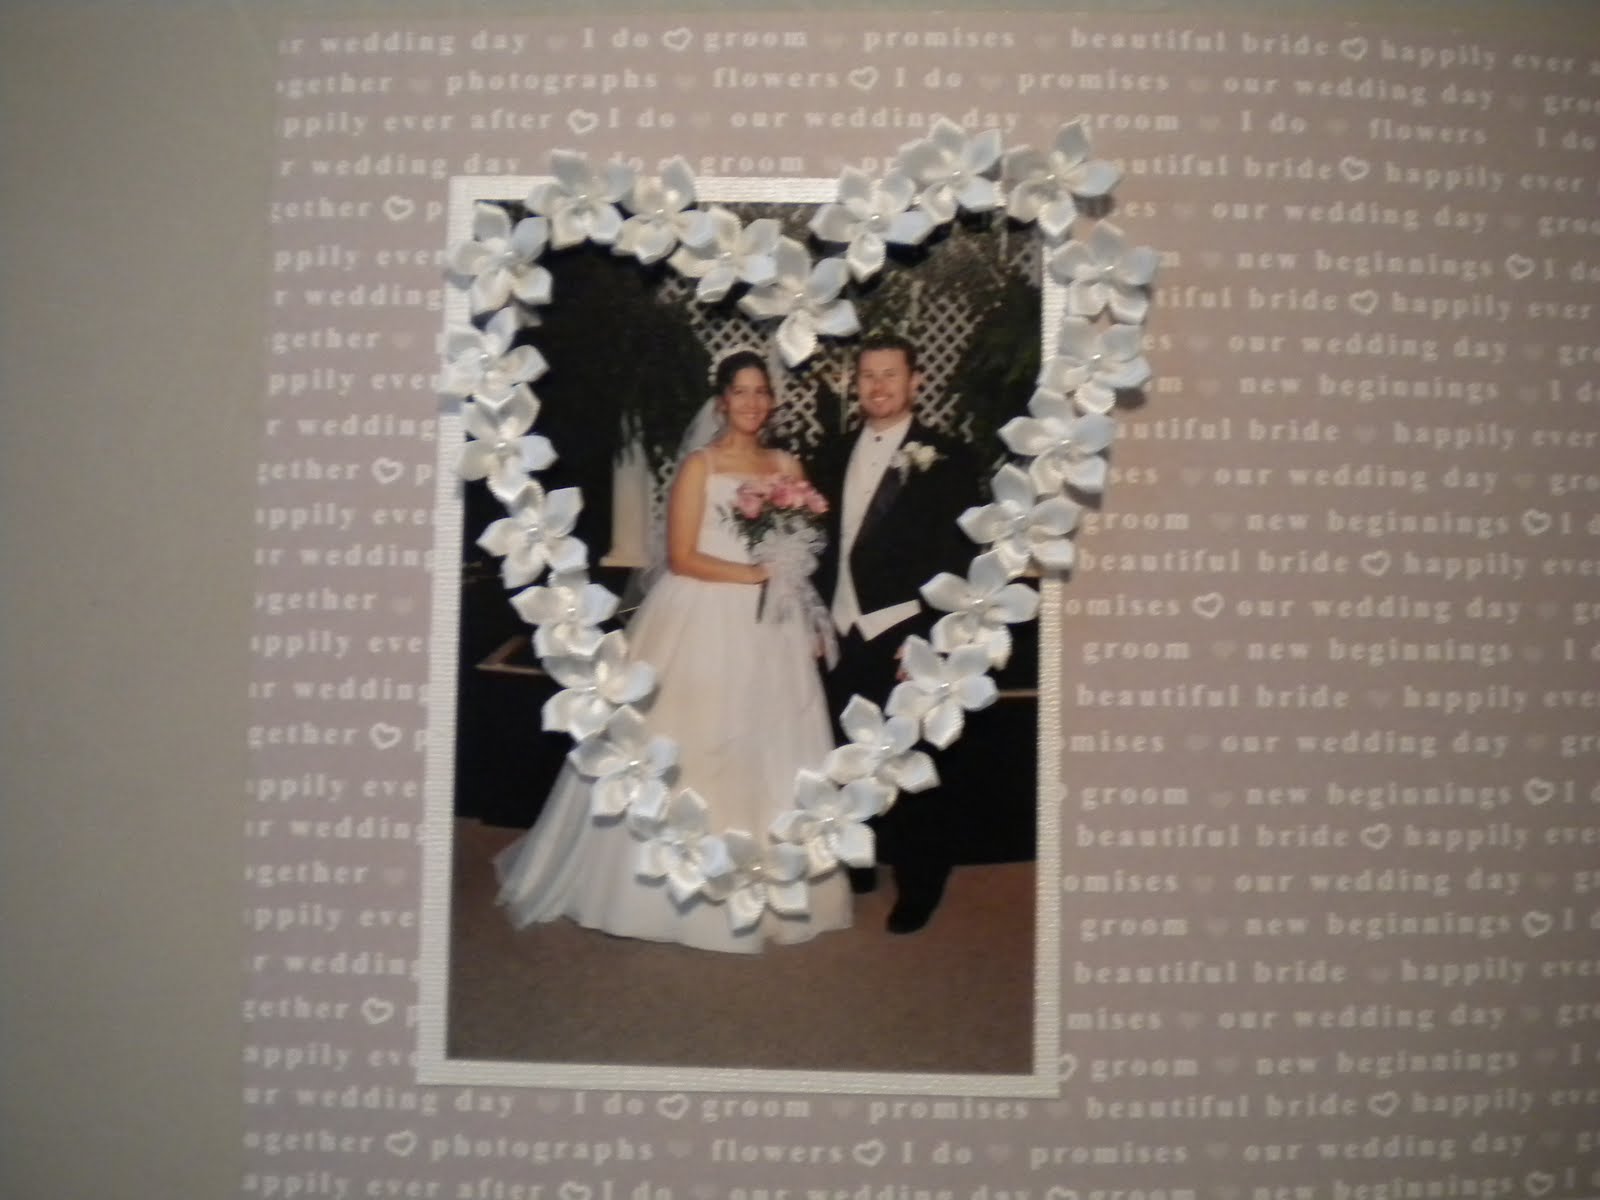
The background sheet of paper I used is by Adorn It. I then hand cut a matt for my photo out of white shimmer cardstock and used some mini flowers I got out of the wedding section at Michaels to create a heart shape around the pictures. The Beautiful at the bottom is a Jolee's sticker from Michaels and I also matted it on black and white cardstock before attaching it to the bottom of my layout.

Here is a close up of the flower heart frame I made.

The background sheet of paper I used is by Adorn It. I then hand cut a matt for my photo out of white shimmer cardstock and used some mini flowers I got out of the wedding section at Michaels to create a heart shape around the pictures. The Beautiful at the bottom is a Jolee's sticker from Michaels and I also matted it on black and white cardstock before attaching it to the bottom of my layout.

Wednesday, May 18, 2011
CWC Challenge 30: Must Include a Balloon: Design Team Project
It is Wednesday and time again for the Cooking with Cricut Challenge. This week, we are challenging you to use a balloon somewhere on your project. Be sure to check out all of the other design team projects and enter the challenge here: http://www.cookingwithcricut.com/.
For my project, I decided to use the negative image of the balloon cuts as my photo areas. I started by using the Gypsy to place three balloons where I wanted my pictures to be and then cut them on my main sheet of paper using the Simply Charmed Cartridge. Next, I trimmed my photos to fit behind the balloon cuts and then put a plain white sheet of paper on the back to keep them in place. I then used the Tie the Knot Cartridge for the Celebrate cut and the Sweet Treats cartridge for the confetti. I outlined the title and the balloon strings. I added some faux stitching around the edge with a white pen and also added some white dots to the title and confetti.
 Here is a picture of the page cut to add the pictures to it. I used the balloon cuts to see how I wanted to place my picture behind the negative images.
 Here is a close up of the dots added to the letters.

For my project, I decided to use the negative image of the balloon cuts as my photo areas. I started by using the Gypsy to place three balloons where I wanted my pictures to be and then cut them on my main sheet of paper using the Simply Charmed Cartridge. Next, I trimmed my photos to fit behind the balloon cuts and then put a plain white sheet of paper on the back to keep them in place. I then used the Tie the Knot Cartridge for the Celebrate cut and the Sweet Treats cartridge for the confetti. I outlined the title and the balloon strings. I added some faux stitching around the edge with a white pen and also added some white dots to the title and confetti.


I am entering this into the following challenge:
Creative Sisters Monday Challenge: Birthday Theme: http://lindascreativity.blogspot.com/2011/05/creative-sisters-monday-challenge-8.html
Monday, May 16, 2011
Wedding Frame
One of the men that works for my husband is getting married next month, and I wanted to make them a monogrammed frame for part of their gift. I got the frame from Michaels Craft Store and it is 10x10 with a middle square that is 5x5. I used the SCAL program to cut everything out with the Cricut. Using black vinyl, I cut the middle area with the regal font and I split the letter and added the last name to the middle using the Rockwell font. I used the Rockwell font again to add John and Kristin and Est. 2011.
I am giving this as a gift, but I think it would also be a great idea to use on the table at a wedding.
 I am also sharing this decoration idea over at Decorate to Celebrate. This is a new blog that Rhonda and Amy are starting. Their first challenge doesn't start until June 1st, but they are allowing you to update any party ideas during their announcement. Be sure to go over and check them out and become a follower here: http://decoratetocelebrate.blogspot.com/
I am giving this as a gift, but I think it would also be a great idea to use on the table at a wedding.

Sunday, May 15, 2011
Rodeo Fun Layout
This layout has some pictures from the Rodeo that Kaylee went to. The background page is from the DCWV paperstack called Mainstreet. I used the Batman Cartridge for the font and added the letters to the banner that was already at the top of this paper. I then wanted to make a lasso to go around the picture area. To do this, I used some hemp twine and tied a circle that I looped around the top picture and then glued it down around the rest of the page.
 Here is a close up of the lasso made out of hemp twine.
 I am entering this into the following challenges:
Frosted Designs: twine or ribbon: http://www.frosteddesigns.blogspot.com/


Frosted Designs: twine or ribbon: http://www.frosteddesigns.blogspot.com/
Friday, May 13, 2011
Wedding Layout
I have another wedding layout for my album that will one day be finished :) I am actually planning on working on it a good bit over the next couple of weeks and trying to finish it up.
I have had this idea for a while and not sure if I will use this as the opening page or the ending page of my album. I used the Sweethearts Cricut Cartridge for the Mr. and Mrs. and cut them out of vinyl to apply to the page. I found the sheer ribbon that has white and silver at Michaels and also found the flower with pearls sticker there. I loved the look of the flower and thought the ribbon worked well with it.
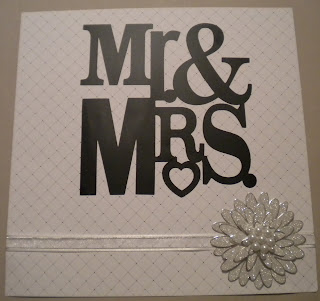
I have had this idea for a while and not sure if I will use this as the opening page or the ending page of my album. I used the Sweethearts Cricut Cartridge for the Mr. and Mrs. and cut them out of vinyl to apply to the page. I found the sheer ribbon that has white and silver at Michaels and also found the flower with pearls sticker there. I loved the look of the flower and thought the ribbon worked well with it.

I am entering this into the following challenges:
Celebrate the Occassion: Wedding with Ribbon: http://celebratetheoccasion.blogspot.com/
Wacky Wednesday at More than Favors: Anything Goes: http://morethanfavors.blogspot.com/
Strawberry Card
Somehow this post has vanished in the blogger problems, so I am re-adding it for the challenges I entered. The strawberry shape card was made with the Simply Charmed Cartridge and the Gypsy. I used the following Cuttlebug folders to emboss the card: Distressed Stripes for the Stem and Swiss Dotts for the berry. The inside sentiment says: "Thank You Berry Much".
 I am entering this into the following challenges:
Bitten by the Bug 2: Strawberry from Simply Charmed: http://heather-bittenbythebug2.blogspot.com/
Whimsical Wednesday: Shape Card: http://whimsicalwednesdays.blogspot.com/

Bitten by the Bug 2: Strawberry from Simply Charmed: http://heather-bittenbythebug2.blogspot.com/
Whimsical Wednesday: Shape Card: http://whimsicalwednesdays.blogspot.com/
Wednesday, May 11, 2011
Cooking with Cricut Challenge: 2 Shades of Pink and a Cupcake or cake: Design Team Project
It's Wednesday and time for a new challenge at Cooking with Cricut. This week we are challenging you to use 2 shades of pink and a cupcake or cake on your project. Be sure to check out all of the projects by the design team and enter your own project into the challenge here: http://www.cookingwithcricut.com/.
For my project, I went with a layout. I used the following cartridges: Once Upon a Princess for the title, Rock Princess for the cupcakes, and Storybook for the frames. I outlined everything with a black marker and added some small glitter dots to the cupcakes.

For my project, I went with a layout. I used the following cartridges: Once Upon a Princess for the title, Rock Princess for the cupcakes, and Storybook for the frames. I outlined everything with a black marker and added some small glitter dots to the cupcakes.
Tuesday, May 10, 2011
Crayon Roll: A Sewing Tutorial
I wanted to make Kaylee a crayon roll and was having trouble finding an easy to follow tutorial. I kind of winged it for the first one and then once I figured it out, I decided to make a second one and try to do a tutorial incase any of you were wanting to try one. :)
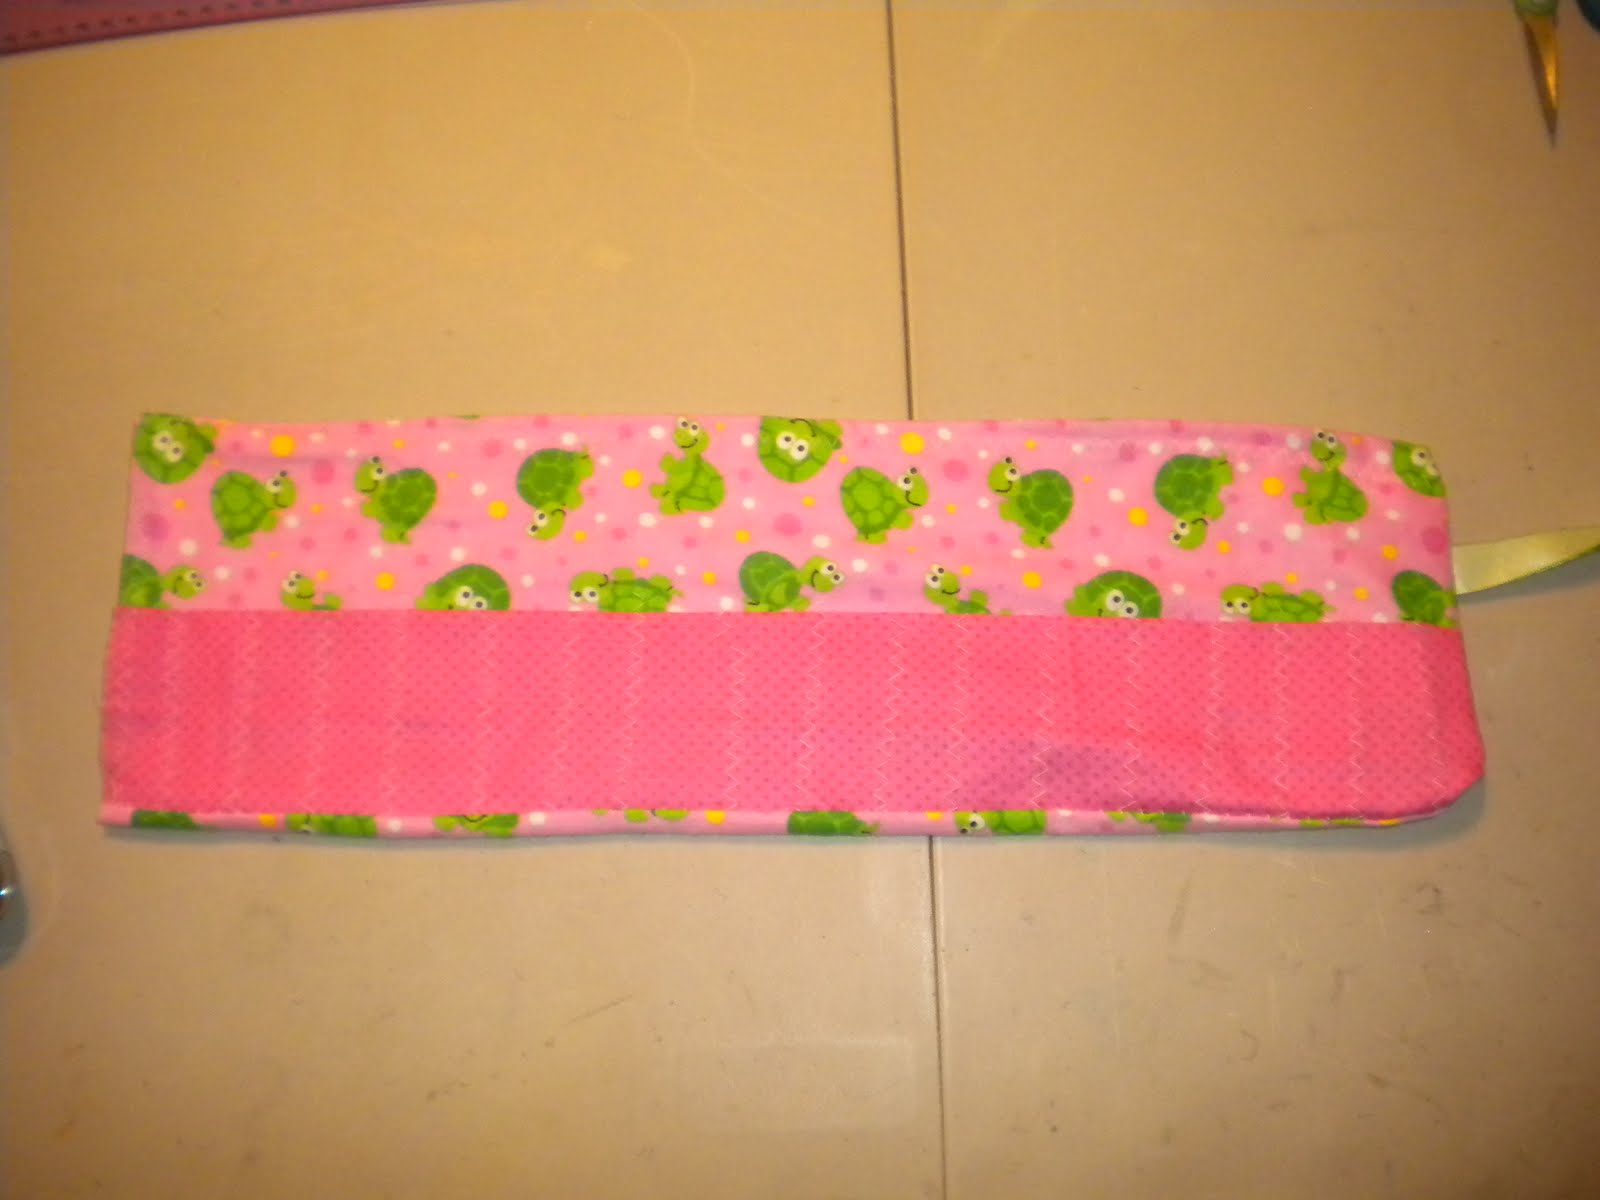
Here is how my crayon roll turned out.

 To make this, I started with 3 pieces of material that were 18 inches wide x 6 inches high. Two pieces will be matching for the front and back and one piece different for the pockets. Once you have your materials selected, you need to fold the inside pocket piece in half and lay it on the inside piece of fabric showing the design. You will need to pin this in place or use a piece of wonder tape, etc to hold the material in place.


 Now, you need to lay your other piece of outside fabric on top of this piece so that the designs are facing each other. Then, pin this together and sew around the edges. Leave a small hole on one end so you will be able to turn your crayon roll inside out.
 Now, I used the ribbon to pull mine inside out. Once it is turned inside out, you can then stitch up the hole you left and topstitch around the top of the crayon roll also.
 Now, your finished crayon roll is ready to add 16 crayons to the pockets and roll it up.
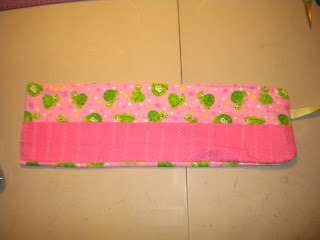
Here is how my crayon roll turned out.


You will need to make a space for each crayon pocket 1 inch apart and then stitch the pockets. You should have 16 pockets.


Now, you are ready to add your ribbon. You will need to stitch ribbon to the center of one end of the roll. Make sure your ribbon does not have the design showing and you have folded it in half. This ribbon will be used to tie the crayon roll up.


Monday, May 9, 2011
Alabama Cup and Shirt
My mom wanted a girly Alabama shirt and couldn't find one like she was looking for, so I decided to make her one to go with her Mother's Day gift. I also made her a matching tumbler. For the Alabama A, I did a google search and found an svg file for this and then I used the font Adlib for the words I put on the tumbler and shirt.
Here is how the tumbler turned out.

 Here is the front of the t-shirt.
 And the back of the t-shirt.
 To make the t-shirt, I used vinyl to cut the design out and used the negative image to place on the shirt. I then just painted over the image with fabric paint and let it dry before removing the vinyl. Here is a picture of the shirt in progress.

Here is how the tumbler turned out.


Sunday, May 8, 2011
Mom, You Rock Card
This is what I came up with for my Mother's card. I used the Wild Card Cartridge for the base and the Birthday Bash Cartridge for the fox. I added an action wobble to him as well. I used star brads in the loops around the base of the card and added the sentiment: "Mom, You Rock!"
 I ame entering this into the following challenges:
Tuesday Throwdown: Mother's Day: http://tuesdaythrowdown.blogspot.com/
PaperCutz: Mother's Day: http://papercutzchallenge.blogspot.com/
My Pink Stamper: NSD Challenge 4: Mother's Day Theme: http://www.mypinkstamper.com/

Tuesday Throwdown: Mother's Day: http://tuesdaythrowdown.blogspot.com/
PaperCutz: Mother's Day: http://papercutzchallenge.blogspot.com/
My Pink Stamper: NSD Challenge 4: Mother's Day Theme: http://www.mypinkstamper.com/
Seal of Approval Card
I made this card for my Aunt for Mother's Day. The base of the card is from the Twinkle Toes Cricut Cartridge and the Seal is from Create a Critter. I added some faux stitching around the edges with a white pen and then hand wrote the sentiment: "When it comes to being a wonderful aunt, you get my seal of approval" I added a little heart button to finish it off.


Friday, May 6, 2011
You Are "Sew" Special Card
I made two matching cards for both of my grandmothers for Mother's Day. I decided to go with a sewing theme so that I could use my new sewing machine and actually sew around the outside of the card. I used the Nifty Fifties cartridge for the sewing machine, Wild Card for the base and A Child's Year for the font. I cut the font out using vinyl, so it would be easy to place on the front of the card. I also added some hand drawn details to the sewing machine, because I thought the cut looked a little plain. The inside sentiment says, "Thanks for being such a great grandmother! Happy Mother's Day!"

I am entering this into the Simply Sunday Challenge at Getting Cricky with K. Andrews. The challenge theme is Sew Fabulous. You can find the challenge here: http://www.gettingcricky.com/

I am entering this into the Simply Sunday Challenge at Getting Cricky with K. Andrews. The challenge theme is Sew Fabulous. You can find the challenge here: http://www.gettingcricky.com/
Time 2 Party Layout
I am still working on layouts from Kaylee's birthday. Maybe one day I will catch up on my scrabooking. I made this layout with the invitation. Pretty simple. I used the Once Upon a Princess Cartridge for the title and Nifty Fifties for the bowling pins. I cut the balls off of the pins and then added a face and a party hat to them.


Everyday in May Celebration with Cooking with Cricut
Over at Cooking with Cricut, we are celebrating the blog-aversary with a celebration project everyday and a blog hop that will be coming up on May 21st. Be sure to stop by and check it out here: http://www.cookingwithcricut.com/.
Today is my day to post and I decided my celebration would be a birthday party. Of course, you could use this project for any party or theme. I wanted to show you how you can create your own themed decorations for a party in an easy and inexpensive way. Here is the party decor that I came up with.
 To create this party set, I started by getting my supplies at the Dollar Store. You can get bags, cups and plates in pretty much any color that you are looking for there. The straws can also be purchased there.
 For the bag, I used pink vinyl to make the cuts for it. I used the Birthday Cakes Cricut Cartridge to cut the Let's Party at a size of 4.32w x 2.76h and the George and Basic Shapes Cartridge for the flowers at a size of 1.88w x 1.71h.
 For the plates, I made the same cuts at the following sizes: Title: 2.67w x 1.71h and the Flowers: 1.10w x 1h.
 For the cups, I only cut flowers to put on them and cut them at a size of 1.88w x 1.71h (the same size used for the bags). I used cardstock to cut the straw flowers. For the flowers to go on the straws, I needed the circle in the middle of my flowers to be larger, so I used the gypsy to hide the circle that was originally there and add a larger one. The flowers are a size of 2.14w x 1.94h and the circle is a size of .32w x .29h.

Today is my day to post and I decided my celebration would be a birthday party. Of course, you could use this project for any party or theme. I wanted to show you how you can create your own themed decorations for a party in an easy and inexpensive way. Here is the party decor that I came up with.


Thursday, May 5, 2011
Published in Ginger Scraps Street Magazine
I just wanted to take a second to say thank you to K. Andrews for publishing me in her section of this month's Ginger Scrap Street Magazine. My Andy Warhol Owl Painting was published. You can visit the magazine here: http://scrapstreet.com/11gss/5maybe/cafe2.htm
Ladybug Flower Pots for Mother's Day
Yesterday, I worked on a few Mother's Day gifts for my two grandmother's and my aunt. I wanted to make something small for them and after a quick trip to get supplies at Walmart, this is what I came up with.

 To make these, I started with a plastic flower pot from Walmart. These were $1 each.
 Now, I used black vinyl to decorate the outside of the pot. I used George and Basic Shapes for the circles and Smiley Cards for the mouth. I also cut two small pink circles for the side of the mouth.
 Next, I used a black pipe cleaner and cut them to 3 1/4 inches. I hot glued a black puff ball to the top of the pipe cleaners and then hot glued on the cleaners and some google eyes to the front.
 Next, I used the Create a Critter cartridge to cut a pair of wings and then outlined them onto foam and hand cut them out. This is because, I wanted them to have a little bit more stability than just paper. Once they were cut, I hot glued them to the back.


Finally, I filled the pots up with butterscotch candies.

I am adding these to the following challenges:
Thankful Thursday: Mother's Day: http://www.crazyaboutcricut.blogspot.com/
PaperCutz: Anything Goes: http://papercutzchallenge.blogspot.com/
Wacky Wednesday at More than Favors: Mother's Day: http://morethanfavors.blogspot.com/
Smartbuygal May Challenge: Flower Pots: http://www.smartbuygal.com/
A Blog Award
I received this award from Jen at http://www.jenscraftcorner.com/?p=861. Thank you so much Jen. If you haven't been to her blog before, be sure to stop by and check out all of her great projects.

Your Blog has been deemed Cricut-tastic! Wear this Badge proudly on your Blog and share it with friends! Since Cricut is 5 years old and they have an E2 out, share this award with 10 people that you think have Cricut-tastic Blogs! You also have to tell 5 Cricut Related things about yourself.
So, here are 5 Cricut-tastic things about me:
1) I got my first Cricut when they came out. I had seen an infomercial about the Cricut and my husband bought me one for Christmas. He was on a waiting list at Michaels to get one.
2) My mom bought me a Cricut Expression for Christmas in 2009. Me and my sister Britney went to Walmart the day after Thanksgiving and waited to get me a black expression and her a red expression.
3) I got a Gypsy for my birthday last year in 2010 and I love it. It is one of the things that I cannot live without.
4) I use my Cricut almost everyday that I am home. I love coming up with ideas and looking at all of the blogs I follow for great ideas and inspiration. I love to make things for my niece Kaylee. I do all of her scrapbooking and make items for her school, birthday, sports, etc.
5) I only buy cartridges that are on sale or I get them off of ebay. I have about 80 cartridges currently.
It is so hard to pass these awards on, because I love all of my followers and all of the blogs I follow. I wish I could pass it on to everybody. I am passing this on to the following 10 blogs. Be sure to stop by and check them out:
1) Tina Time
2) http://amandascraftsandmore.blogspot.com/
3) http://alittlebitofdetail.blogspot.com/
4) http://cardcreationsbyc.blogspot.com/
5) http://kimskreationsblog.blogspot.com/
6) http://luvscrappingtogether.blogspot.com/
7) http://smallbitsofpaper.blogspot.com/
8) http://gator-4-life.blogspot.com/
9) http://craftygolucky.blogspot.com/
10) http://cricutlvr.blogspot.com/
Thanks again to Jen for passing this on to me. I will have a new project posted here later today, so be sure to stop back by for that.
Your Blog has been deemed Cricut-tastic! Wear this Badge proudly on your Blog and share it with friends! Since Cricut is 5 years old and they have an E2 out, share this award with 10 people that you think have Cricut-tastic Blogs! You also have to tell 5 Cricut Related things about yourself.
So, here are 5 Cricut-tastic things about me:
1) I got my first Cricut when they came out. I had seen an infomercial about the Cricut and my husband bought me one for Christmas. He was on a waiting list at Michaels to get one.
2) My mom bought me a Cricut Expression for Christmas in 2009. Me and my sister Britney went to Walmart the day after Thanksgiving and waited to get me a black expression and her a red expression.
3) I got a Gypsy for my birthday last year in 2010 and I love it. It is one of the things that I cannot live without.
4) I use my Cricut almost everyday that I am home. I love coming up with ideas and looking at all of the blogs I follow for great ideas and inspiration. I love to make things for my niece Kaylee. I do all of her scrapbooking and make items for her school, birthday, sports, etc.
5) I only buy cartridges that are on sale or I get them off of ebay. I have about 80 cartridges currently.
It is so hard to pass these awards on, because I love all of my followers and all of the blogs I follow. I wish I could pass it on to everybody. I am passing this on to the following 10 blogs. Be sure to stop by and check them out:
1) Tina Time
2) http://amandascraftsandmore.blogspot.com/
3) http://alittlebitofdetail.blogspot.com/
4) http://cardcreationsbyc.blogspot.com/
5) http://kimskreationsblog.blogspot.com/
6) http://luvscrappingtogether.blogspot.com/
7) http://smallbitsofpaper.blogspot.com/
8) http://gator-4-life.blogspot.com/
9) http://craftygolucky.blogspot.com/
10) http://cricutlvr.blogspot.com/
Thanks again to Jen for passing this on to me. I will have a new project posted here later today, so be sure to stop back by for that.
Wednesday, May 4, 2011
Power is back on
Just wanted to update everybody, my power is back on and I am back at the house. They have said that it could possibly go out again, but so far so good. I am trying to get everything together and trying to get back to normal here. All of the grocery stores are pretty much bare, but I was able to get milk and some things at Sam's because they just got a new shipment in. I am going to be working on some craft items when I get back organized and should have something to post later this week.
Also, I received a blog award and wanted to take a minute to thank the two ladies who passed it on. I received The Versatile Blogger award from: Stacy at http://lovethatbug.blogspot.com/ and from Kim at http://kimskreationsblog.blogspot.com/2011/05/my-first-blog-award.html. Thank you so much ladies!! I have rec'd this award before and have previously passed it on, so if any of my followers would like to grab this, feel free.

Also, I received a blog award and wanted to take a minute to thank the two ladies who passed it on. I received The Versatile Blogger award from: Stacy at http://lovethatbug.blogspot.com/ and from Kim at http://kimskreationsblog.blogspot.com/2011/05/my-first-blog-award.html. Thank you so much ladies!! I have rec'd this award before and have previously passed it on, so if any of my followers would like to grab this, feel free.

Sunday, May 1, 2011
Still No Power: Another Update
Thank you to everybody for all of your nice comments and your prayers. We are still without power in all of our areas. The lines for gas in TN have been up to 3 hours long, because of everybody having to come up here for supplies, etc. They have managed to get some grocery stores in our areas of Alabama up with generators so people can get some food and supplies.
We went down to our house to check everything out and make sure it was okay yesterday and to get some more clothes. We are now back in Tennessee with my grandparents, but they are saying it could now take until Wednesday to get power back on. The main transformers and lines were all destroyed, so they are having to rebuild them. It has been raining today and supposed to be tomorrow, so that could possibly delay it longer if they don't get to work on them.
I will update again in a few days. Hope everybody else is doing good.
We went down to our house to check everything out and make sure it was okay yesterday and to get some more clothes. We are now back in Tennessee with my grandparents, but they are saying it could now take until Wednesday to get power back on. The main transformers and lines were all destroyed, so they are having to rebuild them. It has been raining today and supposed to be tomorrow, so that could possibly delay it longer if they don't get to work on them.
I will update again in a few days. Hope everybody else is doing good.
Subscribe to:
Posts (Atom)